What 100% Actually Requires (and What It Doesn't)
San Andreas built the most demanding completion percentage in the series up to that point, and the game is notoriously vague about which of its hundreds of side activities actually count toward the number ticking up in the pause menu. The real list: every story mission, every vehicle mission chain, all three hidden vehicle challenges (BMX, Chiliad, and NRG-500), every gang tag, snapshot, horseshoe, and oyster, every gym move learned at least once, every courier and asset mission, a pass on every driving/flying/boat school test, every stadium event, a win in every street race across all three cities, and ownership of every safehouse.
What doesn't count is the part that trips people up. The 70 Unique Stunt Jumps scattered across the state aren't required for 100%, they only feed the separate Criminal Rating bonus. Girlfriend relationships maxed to 100% aren't required either, and neither is capturing every gang territory on the map. Chasing those anyway is fine for the challenge, but if your save is stuck at 99% and you've already swept the jumps, the gang war, and every girlfriend, the missing sliver is almost always a collectible or a vehicle mission level you haven't finished.
Collectibles by City: Tags, Snapshots, Horseshoes, and Oysters
Four collectible types sit at the core of the checklist, and each one belongs to a different part of the map rather than a single city.
- 100 Gang Tags: concentrated heavily in Los Santos since they represent rival gang graffiti, spray over each one while standing close enough for CJ's can to reach the wall.
- 50 Snapshot Spots: scattered mostly around San Fierro's landmarks, equip the camera and frame the marked location until the game confirms the photo, no specific angle beyond "the marker is in frame" is required.
- 50 Horseshoes: found across the Las Venturas desert and casino district, mostly in hard-to-spot corners, rooftops, and alleyways rather than open ground.
- 50 Oysters: the only collectible spread across the entire state's waterways rather than one city, expect to dive repeatedly off the coastlines of all three regions and the connecting rivers.
None of these four types reward CJ with a stat boost, they exist purely for the percentage. Pick up a collectibles map before starting a sweep, trying to find all 250 items blind adds hours that contribute nothing to the experience beyond frustration.
Unique Stunt Jumps: Worth Chasing Even Though They Don't Count
The 70 Unique Stunt Jumps are the one major activity on most players' mental completion list that Rockstar actually left out of the 100% requirement. They still matter for a separate reason: landing all of them unlocks the "Kickstart My Heart" reward and contributes to the game's Criminal Rating rather than the completion percentage. Ramps, broken overpasses, and half-built freeway sections across Los Santos, San Fierro, and Las Venturas all hide jumps, and the right vehicle matters more than raw speed.
- Motorcycles for distance jumps: the NRG-500 and FCR-900 clear longer gaps than most cars thanks to their weight and air control.
- Trucks and vans for stability jumps: ramps that demand a clean landing without flipping favor heavier, lower vehicles over sports cars.
- Approach angle over speed: several jumps fail not from insufficient speed but from hitting the ramp at a slight angle, line up dead center before committing.
Skip these if your only goal is the 100% number. Chase them anyway if you want the full state tour, they're genuinely some of the best-designed traversal content in the game.
Vehicle Missions: Taxi, Paramedic, Firefighter, Pimping, Vigilante, and the Freight Train
San Andreas inherited GTA III and Vice City's side-vehicle missions and expanded them into a full checklist of their own, each with its own level cap and reward.
- Taxi (50 fares): complete 50 fares across any taxi to finish this set, the reward is free taxi rides state-wide for the rest of the save.
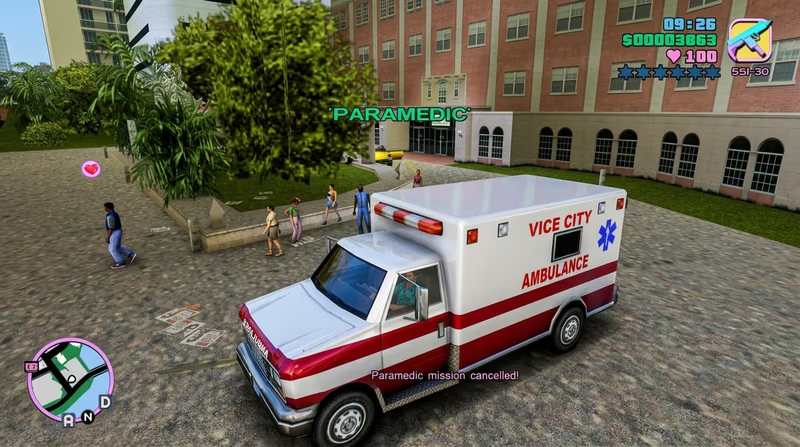
- Paramedic (Level 12): chain successful patient pickups without the timer running out, reaching level 12 permanently boosts CJ's maximum health.
- Firefighter (Level 12): put out burning vehicles before the timer expires, level 12 grants CJ immunity to fire damage for the rest of the game.
- Pimping (Level 10): pick up and deliver working girls in a suitable vehicle within the time limit, level 10 closes out the set with a cash bonus.
- Vigilante (Level 12): eliminate wanted criminals from a police or military vehicle, level 12 grants CJ a permanently maxed bulletproof vest.
- Freight (the cargo train): complete the delivery route on San Andreas' freight train line, a short but easily missed side mission since the train only runs on a fixed track.
Do Paramedic and Vigilante early. The permanent health and armor boosts make every later story mission meaningfully easier, so there's no reason to save them for a late-game cleanup pass.
Driving, Flying, and Boat Schools
San Andreas gates several mid-to-late missions behind driving tests, and locks a handful of specialty vehicles behind gold medal performance rather than a simple pass.
- Driving School: bronze unlocks the basics, but gold on tests like the 8-Track and Wheelie unlocks specific vehicle-handling bonuses that make later missions and street races noticeably easier.
- Pilot School: required reading for the Las Venturas casino heist chain, gold medals here unlock access to the Hunter attack helicopter, one of the most useful vehicles in the late game.
- Boat School: the shortest of the four schools, but still demands a clean pass to count toward the 100% checklist.
- Bike School: optional in terms of story gating, but still required for full completion, and it doubles as useful practice for the BMX and NRG-500 stunt challenges.
Treat gold medals as the real target rather than bronze. The completion checklist only needs a pass, but gold unlocks compound into easier driving across the rest of the playthrough.
Safehouses and Asset Missions
Every safehouse across Los Santos, San Fierro, and Las Venturas needs to be purchased for 100%, and most of them are cheap enough early on that buying them opportunistically as CJ passes through a neighborhood beats a dedicated shopping trip later. Asset missions run in parallel: Zero's RC shop, Wang Cars, the Verdant Meadows airstrip, and the Caligula's Palace casino-related business chains all count toward completion and most also generate a passive cash stream once finished.
- Zero's RC Missions: completing this questline hands CJ ownership of the RC shop and a recurring income, on top of the completion credit.
- Wang Cars: a short chain tied to the used car dealership, finishing it secures both the business and the percentage.
- Verdant Meadows Airstrip: tied into the late-game smuggling plotline, owning it afterward opens a private airfield for storing aircraft.
- Caligula's Palace business chain: the casino heist arc doubles as an asset mission chain once the main heist missions conclude.
Buy safehouses as you go rather than batching them. A property sitting empty in a city CJ has already left behind is one less thing to remember during a final cleanup pass.
Final Stretch: Gym Moves, Gang Territory, and the Last Few Percent
The last stretch of 100% completion tends to be the most tedious rather than the hardest. Every gym across the state needs each of its moves learned at least once, which means visiting all of them even if CJ never needs the combat styles again. Stadium events (the 8-ball, Blood Ring, Dirt Track circuits) and every street race across all three cities also need a single win apiece, not repeated dominance, so losing three times before winning once still counts the same as winning on the first attempt.
- Gym moves: a single training session per move is enough, no need to max out Muscle or Fat stats specifically for this requirement.
- Stadium events and street races: one win per event across every category, difficulty doesn't scale the completion credit so there's no benefit to repeating a win.
- Gang territory: confirmed not required for 100%, despite how central it feels to the Los Santos story arc, skip the full map takeover unless it's for its own sake.
Once collectibles, vehicle missions, schools, safehouses, assets, and the gym/stadium/race sweep are all clear alongside the main story, the percentage should land at 100% on its own. If it stalls just short, recheck oysters and horseshoes first, they're the two collectible types players miss most often thanks to how well they're hidden.