Super Mario 64 Review: The 3D Platformer That Rewrote the Rules
Super Mario 64 didn't just launch the Nintendo 64 — it invented the modern 3D platformer, and three decades later its camera, controls, and level design still hold up as a masterclass.
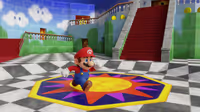
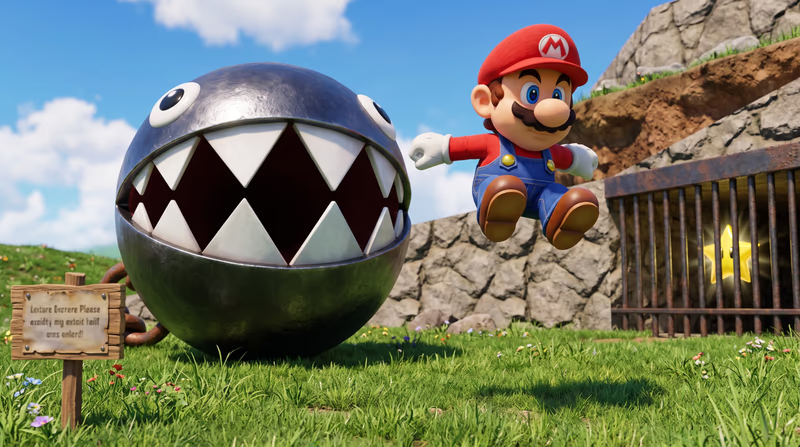
Super Mario 64 (Nintendo, 1996)

Before chasing a single Star, spend five minutes in the castle courtyard just moving. The analog stick governs speed as well as direction, so a light tap walks while a full push sprints, and that distinction matters the moment you need to tiptoe across a narrow beam instead of barreling off it. Practice the jump chain here too: a standing jump into a running jump into a well-timed third press triggers the triple jump, which clears gaps nothing else in your moveset can touch.
The C-buttons control Lakitu's camera, and you'll use them constantly, not just when things go wrong. Pull the camera in behind Mario before any blind jump, and when Lakitu's angle fights you in a tight corridor, don't wrestle with it. Reposition Mario first, then let the camera catch up.
The castle itself gates content by Star count, so don't expect every painting to be open from the start. The ground floor hands you Bob-omb Battlefield, Whomp's Fortress, Jolly Roger Bay, and a handful of others immediately. Clearing enough Stars unlocks the basement, which holds a second batch of courses, and the upper floors stay sealed behind locked doors that only open once your total climbs high enough.
Don't force your way through a single course for every one of its Stars before moving on. If a course is fighting you, back out, grab an easier Star somewhere else, and come back later with a clearer head.
Bob-omb Battlefield is the tutorial course in everything but name, and it's worth fully clearing before touching anything harder. Its six Stars range from a straightforward climb to the mountaintop, to a timed race against Koopa the Quick that punishes hesitation more than poor platforming. Beat Koopa once for the Star, then race him again on a return visit for a second Star tucked behind a faster time requirement.
Whomp's Fortress ramps the verticality up a notch, stacking platforms on top of each other rather than spreading them across open ground. Its boss Star, earned by ground-pounding Whomp himself off the fortress's peak, teaches the ground pound's actual combat use rather than just its block-breaking one. Treat these first two courses as your moveset crash course. Everything from here assumes you've internalized what they teach.
Not every Star deserves equal priority. Once you've cleared the castle's first unlock threshold, a few specific Stars are worth chasing ahead of schedule because they make everything afterward easier.
Grabbing these out of strict course order front-loads skills you'd otherwise learn the hard way under pressure.
Three Bowser fights gate the game's major progress checkpoints, and each one hands you a Key rather than a Star.
Each Bowser fight uses the same core trick: grab his tail with Z, then spin the stick to build momentum before releasing with A to fling him into one of the spiked mines ringing the arena. Three hits ends every one of them.
A handful of Stars consistently stall first-time players, and knowing the trick in advance saves real frustration.
Fifteen courses each hide a Star behind a 100-coin threshold, and chasing these first is the single biggest time-waster in a completionist run. Clear a course's other Stars first. Doing so naturally routes you past most of its coins anyway, since collecting Stars means exploring the whole level rather than one narrow path through it.
When you do sit down for the 100-coin Star specifically, prioritize red coins and blue-coin switch rooms over scattered yellow coins. A single blue-coin switch can flood a room with temporary coins worth five apiece, closing out a 100-coin run in under a minute where yellow coins alone would take several passes.
Once your count crosses 70, the door atop the castle's central staircase opens onto Bowser in the Sky, and nothing stops you from ending the game there. Push for all 120 instead, and the castle itself hands you the last one: collecting every other Star unlocks a final Star sitting in the castle's third-floor corridor, placed there specifically as the 120th reward.
Finishing with 120 instead of 70 doesn't change the ending cutscene, but it does confirm you've wrung every secret out of a game that still rewards close attention to its rooftops, moats, and basement corners thirty years on. Take the extra hours. The game was built assuming you would.

Affiliate link: Support the blog via Instant Gaming at no extra cost.
Super Mario 64
Others Posts
Super Mario 64 didn't just launch the Nintendo 64 — it invented the modern 3D platformer, and three decades later its camera, controls, and level design still hold up as a masterclass.
We dismantle the Nintendo 64 to understand its revolutionary graphics architecture, analyze the stubborn—and costly—decision to stick with ROM cartridges, and celebrate the nostalgic magic of a console that pioneered 3D movement and defined the golden era of split-screen local multiplayer.
We analyze the return of the legendary alliance between Nintendo and Square. A remake that strictly honors its 1996 roots while dressing up in gorgeous diorama graphics and polished combat.
We explore the Nintendo GameCube's surprisingly muscular architecture, its quirky, toy-like design, and the brutal market realities it faced against the DVD-playing juggernauts of its era.

We explore how Nintendo traded teraflops for accessibility, turning a glorified remote control into a global cultural phenomenon that brought gaming to living rooms, retirement homes, and the masses.

We explore how Nintendo dominated the 16-bit console war not through sheer CPU speed, but through a masterful integration of custom audio-visual processors, revolutionary controller ergonomics, and an ingenious strategy of in-cartridge hardware expansion.
Valve took the tightest puzzle design in the industry, doubled the toolset, added a co-op campaign and two of gaming's best-written characters, and somehow made the sequel better than the original.
Anno 1800 rebuilds the series around the smoke and steel of the second Industrial Revolution, turning supply-chain logistics into the genre's richest city-building puzzle.
An engineering retrospective on the Nintendo Game Boy Color. We explore how a double-speed Sharp SM83 core, a backward-compatible palette-mapped color LCD, and translucent 'Atomic Purple' shells turned a stopgap handheld into the system that carried Pokémon's second generation.

Analysis of the PlayStation 4 and PS4 Pro hardware. We examine the shared CPU bottleneck, the mirrored butterfly GPU design, memory optimizations, and the hardware-level checkerboard rendering that enabled the 4K transition.
games
Techland traded gritty realism for painterly legend in this arcade-shooter retelling of the Old West's most famous gunslingers, bounty hunters, and outlaws.